When you select Custom Keywords as the Search/navigation method, you can connect articles based on manually assigned keywords, regardless of their categories, tags, or titles.
TIP Next Post Pro uses these keywords to retrieve the posts that will be used as the previous/secondary and next/primary navigation items.
You can also manage keywords efficiently by adding or removing them in bulk, making it easier to organize navigation across multiple articles.
Here’s how to proceed:
Select Custom Keywords as Search/navigation method
As a starting point, go to TIP Plugins > TIP Next Post Pro > Plugin Settings and select Custom Keywords as the Search/navigation method.
Add keywords individually
- Open the article you want to edit.
- In the dedicated Custom Keywords section, type each relevant keyword and press Enter to confirm it.
- You can also select keywords that are already used in other articles.
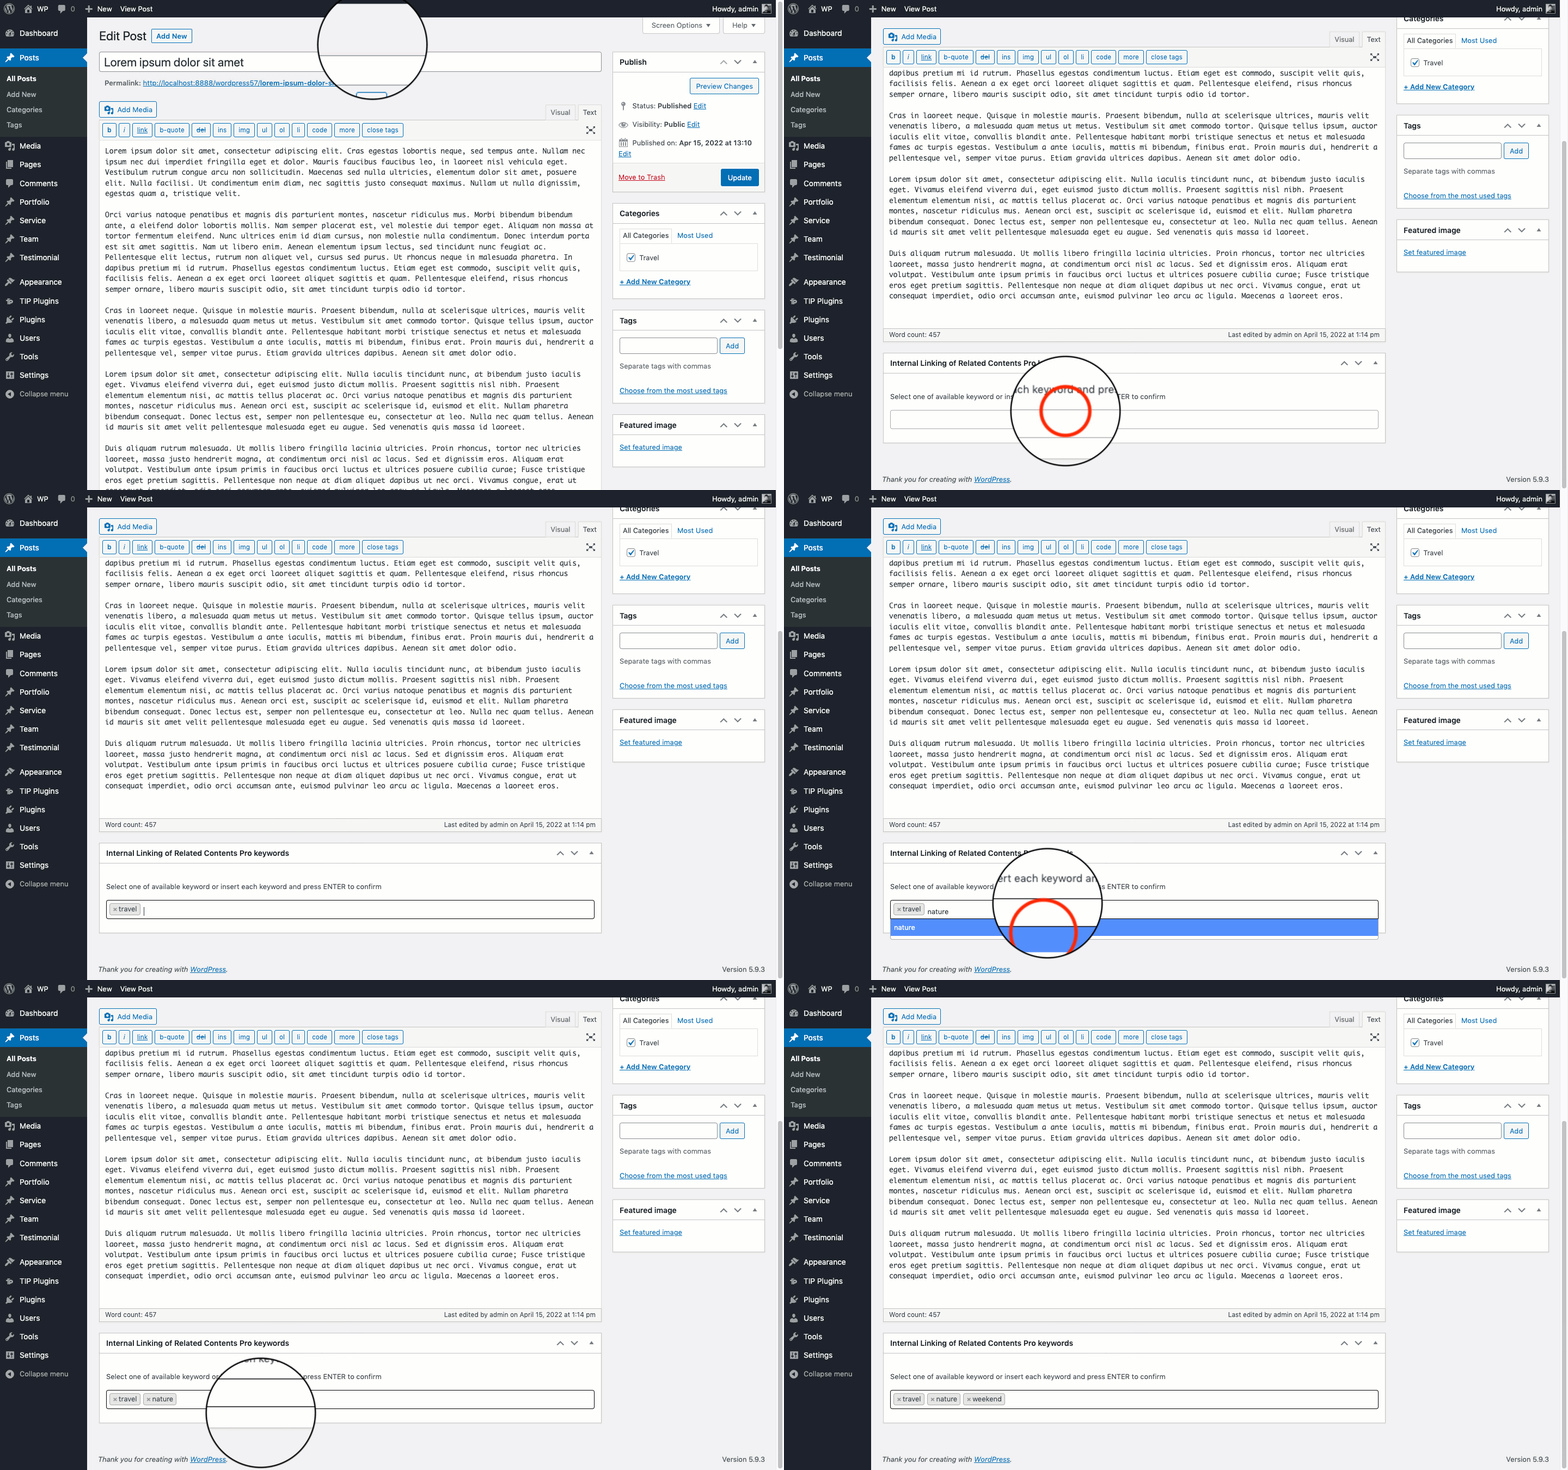
Articles that share matching keywords can then be used by TIP Next Post Pro as navigation results.
Bulk edit
- Select one or more articles from the WordPress Posts screen.
- Choose Edit from the Bulk actions menu and click Apply.
- In the window that opens, you can add or remove the desired keywords. Separate multiple keywords with a vertical bar (|).
This process simplifies keyword management and allows you to quickly control which articles can be connected through the Custom Keywords search method.
Use Custom Keywords when you want greater editorial control over the navigation results without relying exclusively on categories, tags, or article titles.